🎮 Game Dev (게임개발)/PC (데스크탑, 노트북, 터치패널)
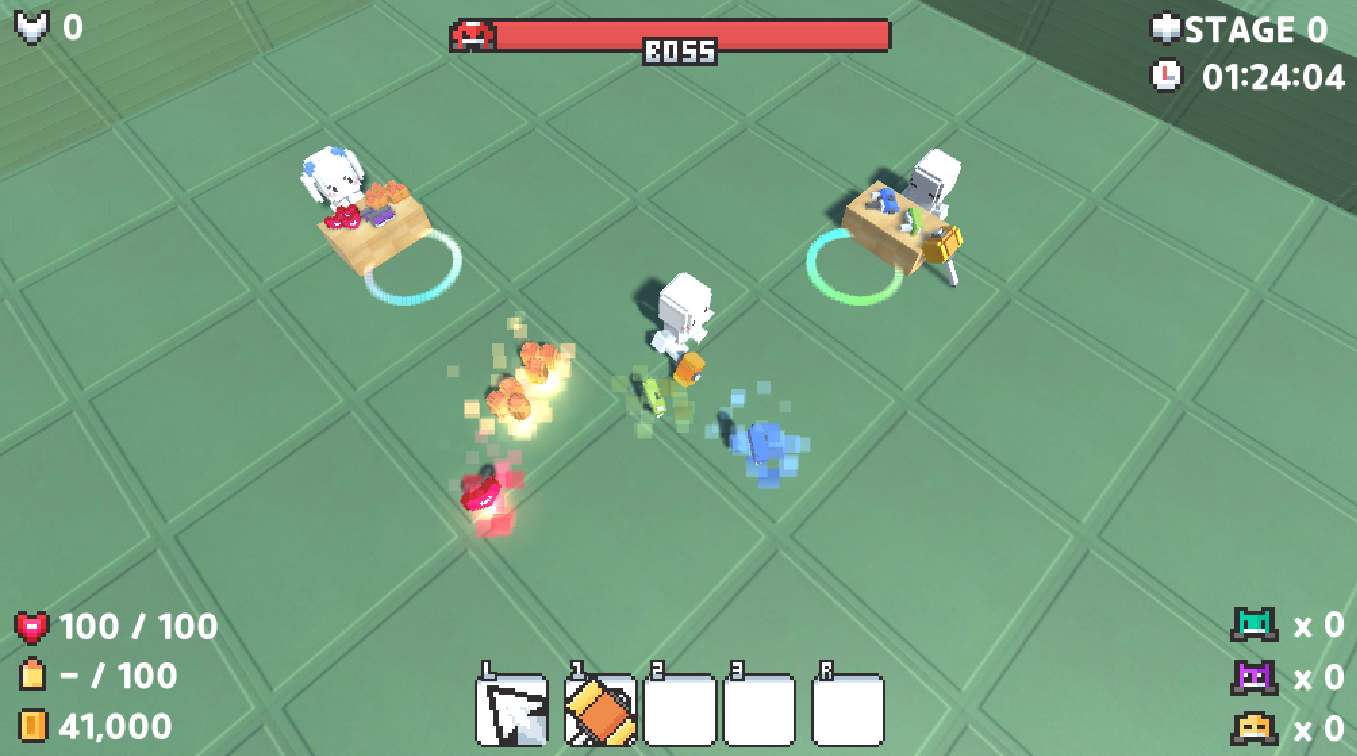
[3D 액션게임] 16. UI 로직 연결하기
- -
🔔 유튜브 크리에이터 골든메탈님의 유니티강의 3D 쿼터뷰 액션게임 [BE5] 를 보고 공부하여 작성한 게시글입니다! 🔔
Game Manager 스크립트 코드 전체보기
더보기
using System.Collections;
using System.Collections.Generic;
using UnityEngine;
using UnityEngine.UI;
public class GameManager : MonoBehaviour
{
    public GameObject menuCam;
    public GameObject gameCam;
    public Player player;
    public Boss boss;
    public int stage;
    public float playTime;
    public bool isBattle;
    public int enemyCntA;
    public int enemyCntB;
    public int enemyCntC;

    public GameObject menuPanel;
    public GameObject gamePanel;
    public Text maxScoreTxt;
    public Text scoreTxt;
    public Text stageTxt;
    public Text playerTimeTxt;
    public Text playerHealthTxt;
    public Text playerAmmoTxt;
    public Text playerCoinTxt;
    public Image weapon1Img;
    public Image weapon2Img;
    public Image weapon3Img;
    public Image weaponRImg;
    public Text enemyATxt;
    public Text enemyBTxt;
    public Text enemyCTxt;
    public RectTransform bossHealthGroup;
    public RectTransform bossHealthBar;

    void Awake()
    {
        maxScoreTxt.text = string.Format("{0:n0}", PlayerPrefs.GetInt("MaxScore"));
    }

    public void GameStart()
    {
        menuCam.SetActive(false);
        gameCam.SetActive(true);

        menuPanel.SetActive(false);
        gamePanel.SetActive(true);

        player.gameObject.SetActive(true);
    }

    void Update()
    {
        if (isBattle)
            playTime += Time.deltaTime;
    }

    void LateUpdate() //Update 끝난 후 호출되는 생명주기
    {
        // 상단 UI
        scoreTxt.text = string.Format("{0:n0}", player.score);
        stageTxt.text = "STAGE " + stage;

        int hour = (int)(playTime / 3600);
        int min = (int)((playTime - hour * 3600) / 60);
        int sec = (int)(playTime % 60);
        playerTimeTxt.text = string.Format("{0:00}", hour) + ":" + string.Format("{0:00}", min) + ":"+ string.Format("{0:00}", sec);

        // 플레이어 UI
        playerHealthTxt.text = player.health + " / " + player.maxHealth;
        playerCoinTxt.text = string.Format("{0:n0}", player.coin);
        if (player.equipWeapon == null)
            playerAmmoTxt.text = "- / " + player.ammo;
        else if (player.equipWeapon.type == Weapon.Type.Melee)
            playerAmmoTxt.text = "- / " + player.ammo;
        else
            playerAmmoTxt.text = player.equipWeapon.curAmmo + " / " + player.ammo;

        // 무기 UI
        weapon1Img.color = new Color(1, 1, 1, player.hasWeapons[0] ? 1 : 0);
        weapon2Img.color = new Color(1, 1, 1, player.hasWeapons[1] ? 1 : 0);
        weapon3Img.color = new Color(1, 1, 1, player.hasWeapons[2] ? 1 : 0);
        weaponRImg.color = new Color(1, 1, 1, player.hasGrenades > 0 ? 1 : 0);

        // 몬스터 숫자 UI
        enemyATxt.text = "x " + enemyCntA.ToString();
        enemyBTxt.text = "x " + enemyCntB.ToString();
        enemyCTxt.text = "x " + enemyCntC.ToString();

        // 보스 체력 UI
        bossHealthBar.localScale = new Vector3((float)boss.curHealth / boss.maxHealth, 1, 1);
    }
}
🧷 1. 타이틀 카메라
- 카메라 생성

- 기본 카메라를 복사 붙혀넣기 하여 2개로 나눠줍니다.
- 하나는 지금까지 만들어온 카메라로 Game 뷰를 담당하는 Game Camera이고
- 하나는 시작 시, 메뉴를 보여주는 카메라입니다.
- 메뉴 카메라 애니메이션

- 효과를 주기 위하여, 요요 로테이션이라는 이름의 애니메이션을 만들어 카메라에 부착시킵니다.
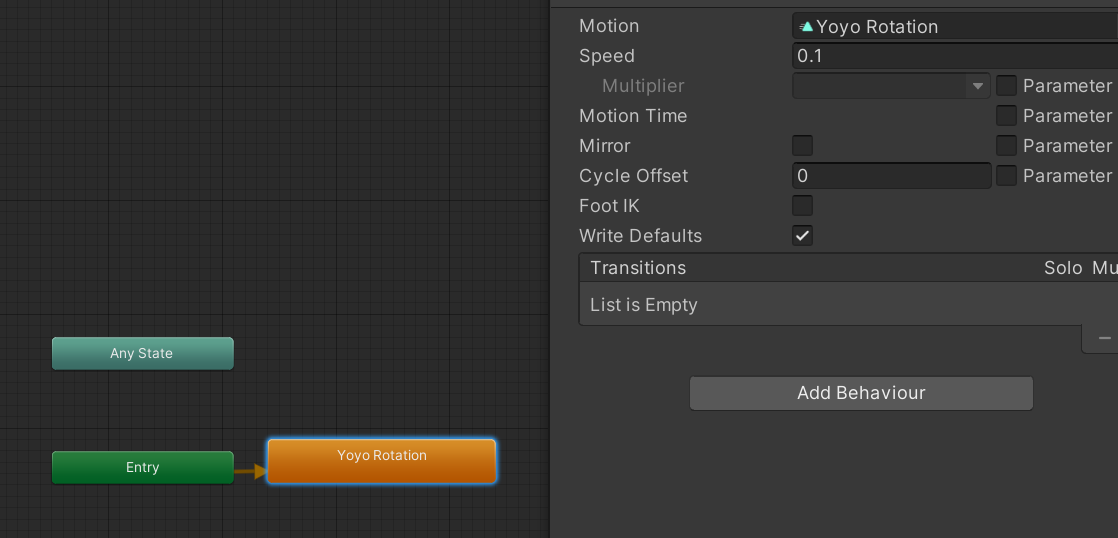
- 효과 Speed는 0.1로 둡니다
- 애니메이션을 더블클릭하여, Loop Time 체크박스를 체크해줍니다.
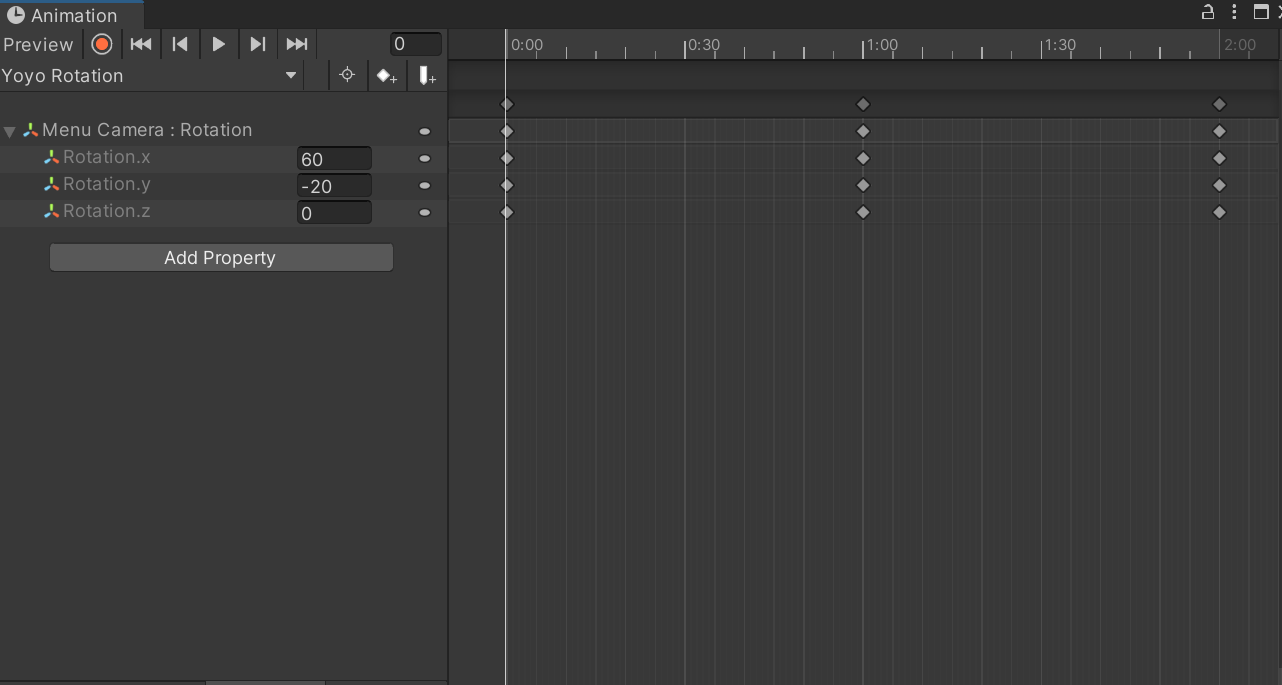
- 애니메이션에 Rotation Property를 둡니다
- 시작과 끝은 X:60, Y:-20 1초대는 X:60, Y:20 으로 회전 루프를 돌려줍니다.
🧷 2. 게임 매니저 컴포넌트
- GameManger script
using System.Collections;
using System.Collections.Generic;
using UnityEngine;
using UnityEngine.UI;
public class GameManager : MonoBehaviour
{
    public GameObject menuCam;
    public GameObject gameCam;
    public Player player;
    public Boss boss;
    public int stage;
    public float playTime;
    public bool isBattle;
    public int enemyCntA;
    public int enemyCntB;
    public int enemyCntC;

    public GameObject menuPanel;
    public GameObject gamePanel;
    public Text maxScoreTxt;
    public Text scoreTxt;
    public Text stageTxt;
    public Text playerTimeTxt;
    public Text playerHealthTxt;
    public Text playerAmmoTxt;
    public Text playerCoinTxt;
    public Image weapon1Img;
    public Image weapon2Img;
    public Image weapon3Img;
    public Image weaponRImg;
    public Text enemyATxt;
    public Text enemyBTxt;
    public Text enemyCTxt;
    public RectTransform bossHealthGroup;
    public RectTransform bossHealthBar;
}
- 게임에 필요한 오브젝트, 스크립트들과 변경되는 UI 들을 담을 변수를 생성해줍니다.
- GameManger object
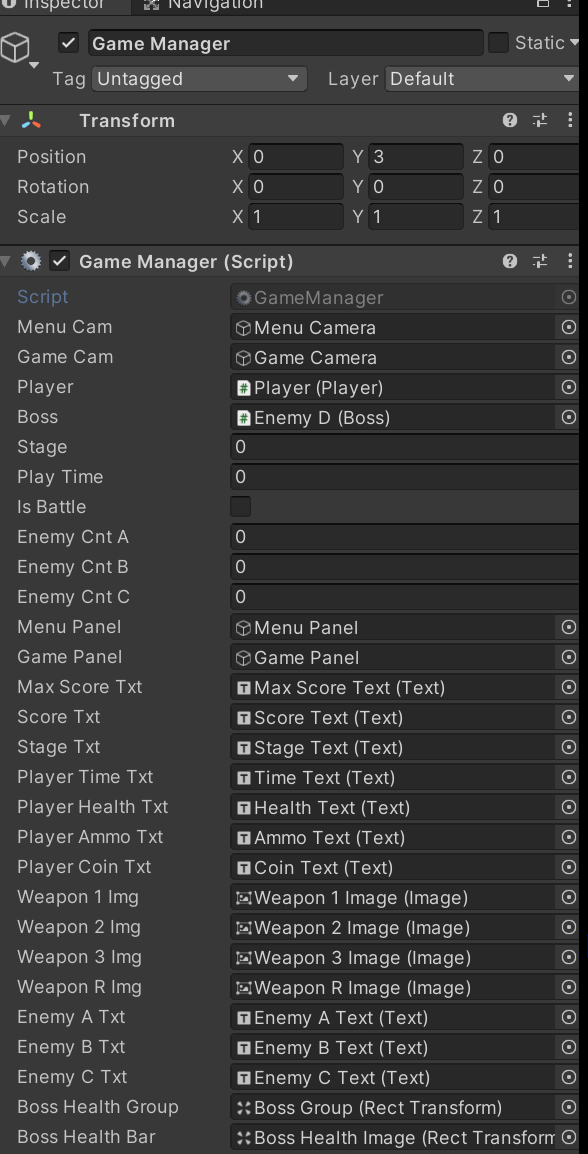
- 빈 오브젝트를 만들어, 스크립트를 넣어주고 각 컴포넌트들을 연결시켜 줍니다.
🧷 3. 게임과 UI 연결 기능
- Menu UI
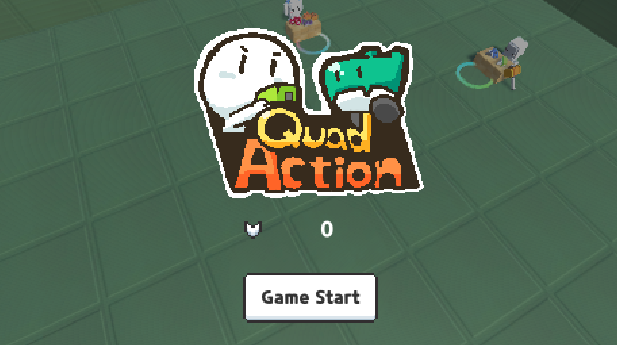
게임 최대 점수 표시
// Player Script
void Awake()
{
    PlayerPrefs.SetInt("MaxScore", 100000);
}- (앞으로 구현) 최대 점수기능을 플레이어 스크립트에서 MaxScore을 PlayerPrefs를 통해 넣어준다음
/* Game Manager script */
void Awake()
{
    maxScoreTxt.text = string.Format("{0:n0}", PlayerPrefs.GetInt("MaxScore"));
}- 게임 오브젝트 스크립트에서 텍스트에 넣어줍니다
++ Format 방식과, PlayerPrefs는 차후에 다른 포스팅에서 다루겠습니다
Game Start 버튼
/* Game Manager script */
public void GameStart()
{
    menuCam.SetActive(false);
    gameCam.SetActive(true);

    menuPanel.SetActive(false);
    gamePanel.SetActive(true);

    player.gameObject.SetActive(true);
}- GameStart 버튼 클릭시 카메라와 플레이어 게임 오브젝트 활성화를 컨트롤해줍니다.
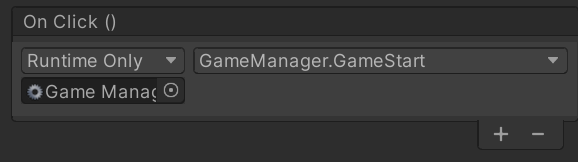
- Button의 On Click() 이벤트 함수를 집어넣어줍니다.
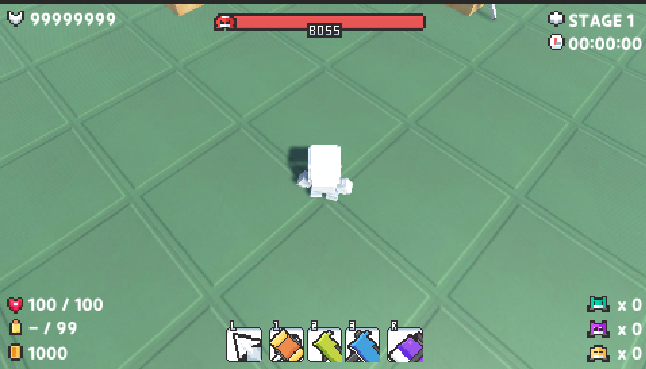
- Game UI
void Update()
{
    if (isBattle)
        playTime += Time.deltaTime;
}

void LateUpdate() //Update 끝난 후 호출되는 생명주기
{
    // 상단 UI
    scoreTxt.text = string.Format("{0:n0}", player.score);
    stageTxt.text = "STAGE " + stage;

    int hour = (int)(playTime / 3600);
    int min = (int)((playTime - hour * 3600) / 60);
    int sec = (int)(playTime % 60);
    playerTimeTxt.text = string.Format("{0:00}", hour) + ":" + string.Format("{0:00}", min) + ":"+ string.Format("{0:00}", sec);

    // 플레이어 UI
    playerHealthTxt.text = player.health + " / " + player.maxHealth;
    playerCoinTxt.text = string.Format("{0:n0}", player.coin);
    if (player.equipWeapon == null)
        playerAmmoTxt.text = "- / " + player.ammo;
    else if (player.equipWeapon.type == Weapon.Type.Melee)
        playerAmmoTxt.text = "- / " + player.ammo;
    else
        playerAmmoTxt.text = player.equipWeapon.curAmmo + " / " + player.ammo;

    // 무기 UI
    weapon1Img.color = new Color(1, 1, 1, player.hasWeapons[0] ? 1 : 0);
    weapon2Img.color = new Color(1, 1, 1, player.hasWeapons[1] ? 1 : 0);
    weapon3Img.color = new Color(1, 1, 1, player.hasWeapons[2] ? 1 : 0);
    weaponRImg.color = new Color(1, 1, 1, player.hasGrenades > 0 ? 1 : 0);

    // 몬스터 숫자 UI
    enemyATxt.text = "x " + enemyCntA.ToString();
    enemyBTxt.text = "x " + enemyCntB.ToString();
    enemyCTxt.text = "x " + enemyCntC.ToString();

    // 보스 체력 UI
    bossHealthBar.localScale = new Vector3((float)boss.curHealth / boss.maxHealth, 1, 1);
}- 플레이타임만 Update 구문에서 구합니다
- 나머지 UI 관련 바꿔줄 함수들은 LateUpdate 구문에서 바꿔줍니다.
- 나머지는 코드를 보며 이해하는게 편하실 겁니다, 그런데 보스 체력의 줄어드는 바는 꼭 float로 둬야지 차례대로 잘 줄어드는 것을 볼 수 있습니다.
주의사항

GameManager 스크립트에서 이용하려면, 사용하는 변수가 Player 스크립트에서 public 인지 확인해주고 안되어있으면 꼭 public을 해줍시다.
느낀점
이번 강의에서는 GameManager이란 스크립트를 통하여 전반적인 게임 UI들을 조작하는 방식을 배웠습니다.
기능들이 정말 깔끔했고, 변수명을 잘 지어놔야지 연결작업을 할 때 무척 편하겠다고 생각이 들고,
역시 개발자는 변수명 짓는걸 정말 잘해야겠다고 느낍니다.
출처: 골든메탈님 유튜브
https://www.youtube.com/watch?v=7B9BsVnG8D8&list=PLO-mt5Iu5TeYkrBzWKuTCl6IUm_bA6BKy&index=16
'🎮 Game Dev (게임개발) > PC (데스크탑, 노트북, 터치패널)' 카테고리의 다른 글
| [3D 액션게임] 18. 버그 고치기 (0) | 2022.04.24 |
|---|---|
| [3D 액션게임] 17. 게임 완성하기 (0) | 2022.04.15 |
| [3D 액션게임] 15. 상점 만들기 (0) | 2022.04.11 |
| [3D 액션게임] 14. UI 배치하기 (0) | 2022.04.09 |
| [3D 액션게임] 13. 보스 만들기 (0) | 2022.04.09 |
Contents
소중한 공감 감사합니다