🎮 Game Dev (게임개발)/PC (데스크탑, 노트북, 터치패널)
[3D 액션게임] 11. 목표를 추적하는 AI 만들기
- -
🔔 유튜브 크리에이터 골든메탈님의 유니티강의 3D 쿼터뷰 액션게임 [BE5] 를 보고 공부하여 작성한 게시글입니다! 🔔
Enemy script 전체보기
더보기
using System.Collections;
using System.Collections.Generic;
using UnityEngine;
using UnityEngine.AI;

public class Enemy : MonoBehaviour
{
    public int maxHealth;
    public int curHealth;
    public Transform Target;
    public bool isChase;

    Rigidbody rigid;
    BoxCollider boxCollider;
    Material mat;
    NavMeshAgent nav;
    Animator anim;

    void Awake()
    {
        rigid = GetComponent<Rigidbody>();
        boxCollider = GetComponent<BoxCollider>();

        // Material은 Mesh Renderer 컴포넌트에서 접근가능합니다.
        mat = GetComponentInChildren<MeshRenderer>().material;
        // 네비게이션
        nav = GetComponent<NavMeshAgent>();
        //애니메이션
        anim = GetComponentInChildren<Animator>();

        Invoke("ChaseStart", 2);

    }

    void ChaseStart()
    {
        isChase = true;
        anim.SetBool("isWalk", true);

    }

    void Update()
    {
        if(isChase)
            nav.SetDestination(Target.position);
    }

    void FreezeVelocity()
    {
        if (isChase) {
            rigid.velocity = Vector3.zero;
            rigid.angularVelocity = Vector3.zero;
        }
    }

    void FixedUpdate()
    {
        FreezeVelocity();
    }

    void OnTriggerEnter(Collider other)
    {
        if(other.tag == "Melee"){
            Weapon weapon = other.GetComponent<Weapon>();
            curHealth -= weapon.damage;
            Vector3 reactVec = transform.position - other.transform.position;

            StartCoroutine(OnDamage(reactVec, false));
        }
        else if(other.tag == "Bullet"){
            Bullet bullet = other.GetComponent<Bullet>();
            curHealth -= bullet.damage;
            Vector3 reactVec = transform.position - other.transform.position;

            Destroy(other.gameObject);

            StartCoroutine(OnDamage(reactVec, false));
        }
    }


    public void HitByGrenade(Vector3 explosionPos)
    {
        curHealth -= 100;
        Vector3 reactVec = transform.position - explosionPos;
        StartCoroutine(OnDamage(reactVec, true));
    }

    IEnumerator OnDamage(Vector3 reactVec, bool isGrenade)
    {
        mat.color = Color.red;
        yield return new WaitForSeconds(0.1f);

        if(curHealth > 0) {
            mat.color = Color.white;
        }
        else {
            mat.color = Color.gray;
            gameObject.layer = 12;
            isChase = false;
            nav.enabled = false;
            anim.SetTrigger("doDie");


            // 죽었을 시, 넉백

            if (isGrenade)
            {
                reactVec = reactVec.normalized;
                reactVec += Vector3.up * 3;

                rigid.freezeRotation = false; // freezeRotation
                rigid.AddForce(reactVec * 5, ForceMode.Impulse);
                rigid.AddTorque(reactVec * 15, ForceMode.Impulse);
            }
            else
            {
                reactVec = reactVec.normalized;
                reactVec += Vector3.up;
                rigid.AddForce(reactVec * 5, ForceMode.Impulse);
            }
            Destroy(gameObject, 4);
        }
    }
}
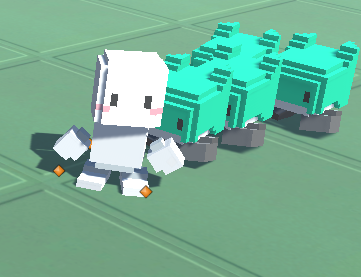
🧷 1. 몬스터 오브젝트 만들기
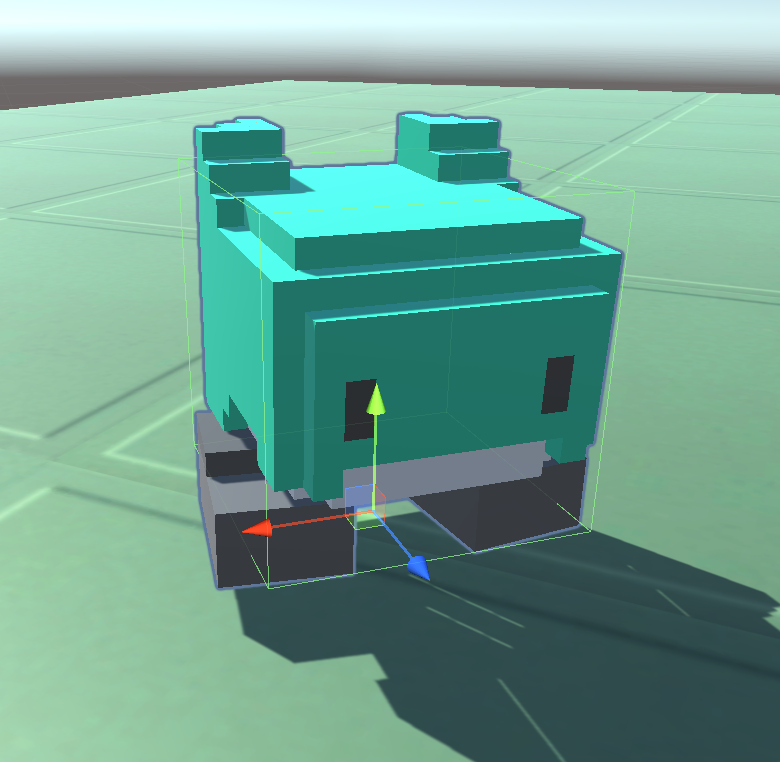
- Assets/QuarterView 3D Action BE5/Prefabs/Enemy A.prefab 경로의 Enemy A를 불러옵니다.
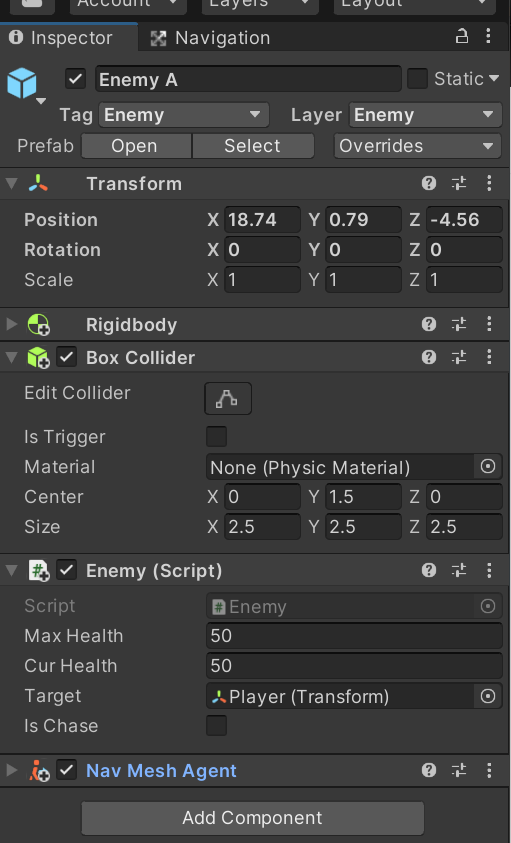
- 이전에 만든 testEnemy처럼, rigidbody, Box Collider, Enemy 스크립트에 이어서 Nav Mesh Agent 컴포넌트 까지 넣어줍시다.
- 여기서 꼭 Tag와 Layer을 Enemy로 바꿔줘야합니다.
🧷 2. 네비게이트
/*Enemy script, 추가되는 부분만 넣었습니다. */
using UnityEngine.AI;

public class Enemy : MonoBehaviour
{
    public Transform Target;
    public bool isChase;

    NavMeshAgent nav;
    Animator anim;

    void Awake()
    {
        // 네비게이션
        nav = GetComponent<NavMeshAgent>();

        Invoke("ChaseStart", 2);
    }

    void ChaseStart()
    {
        isChase = true;
    }

    void Update()
    {
        if(isChase)
            nav.SetDestination(Target.position);
    }

    void FreezeVelocity()
    {
        if (isChase) {
            rigid.velocity = Vector3.zero;
            rigid.angularVelocity = Vector3.zero;
        }
    }

    void FixedUpdate()
    {
        FreezeVelocity();
    }
}- 네비게이트를 사용하기 위해, UnityEngine.AI를 불러옵시다.
- 현재 몬스터가 추적중인지 판단하는 bool isChase, 추적할 대상인 target(플레이어)를 설정합니다.
- 여기서 핵심인 아까 컴포넌트로 넣은 NavMeshAgent를 불어옵시다.
- update() 구문에서 nav.SetDestination(Target.position)을 통해 적의 목표위치를 지속적으로 업데이트 시켜주면 적이 추적합니다.
- 이후 ChaseStart()란 함수를 따로 두어, Invoke로 게임 시작 후 2초 후에 불러옵시다.
- FreezeVelocity()함수는 플레이어의 몸에 적이 닿을 시, 적의 속력을 0으로 만들어 줘서, 이후 움직임에 영향을 주지 않기 위함입니다. 이 함수는 FixedUpdate()에 넣어둡니다.
/*Enemy script, 추가되는 부분만 넣었습니다. */
using UnityEngine.AI;

public class Enemy : MonoBehaviour
{

    IEnumerator OnDamage(Vector3 reactVec, bool isGrenade)
    {

        if(curHealth > 0) {}
        else {
            isChase = false;
            nav.enabled = false;
        }
    }
}- 적이 죽었을 때, isChase는 false값으로, navigate도 비활성화 시켜주었습니다.
🧷 3. 애니메이션

- 새로운 Animator인 Enemy A 를 만들고, 에셋에서 Enemy A에 대한 애니메이션들을 다 가져옵니다.
- Idle은 우클릭을 통해 Default state로 만들고, Walk와 Attack State와 연결시켜 줬습니다.
- 죽을 때 트리거인 doDie와, 걸을 떄 공격할 때 bool값으로 isWalk와 isAttack을 각각의 트랜잭션에 넣어주고 Has Exit time도 꺼주도록 합시다.
/*Enemy script, 추가되는 부분만 넣었습니다. */
public class Enemy : MonoBehaviour
{
    Animator anim;
    void Awake()
    {
        //애니메이션
        anim = GetComponentInChildren<Animator>();
    }

    void ChaseStart()
    {
        anim.SetBool("isWalk", true);
    }

    IEnumerator OnDamage(Vector3 reactVec, bool isGrenade)
    {
 	if(curHealth > 0) {}
    else {
        anim.SetTrigger("doDie");
        }
	}

}- Attack을 제외한, Walk와 Die State는 각각 쫓을 때, 죽을 때 값을 애니메이션에 넣어줍시다.
이번 시간에는 Navigate라는 것을 쉽게 만들어 적이 타겟을 향해 쉽게 움직여 주는 기능을 써봤는데, 이런것들이 구현이 잘 되어있어서 쉽게 게임을 만들 수 있겠다 라고 느꼈습니다.
출처: 골든메탈님 유튜브
https://www.youtube.com/watch?v=FBY_cmtCNHw&list=PLO-mt5Iu5TeYkrBzWKuTCl6IUm_bA6BKy&index=11
'🎮 Game Dev (게임개발) > PC (데스크탑, 노트북, 터치패널)' 카테고리의 다른 글
| [3D 액션게임] 13. 보스 만들기 (0) | 2022.04.09 |
|---|---|
| [3D 액션게임] 12. 다양한 몬스터 만들기 (1) | 2022.04.07 |
| [3D 액션게임] 10. 수류탄 구현하기 (0) | 2022.04.06 |
| [3D 액션게임] 09. 피격 테스터 만들기 (0) | 2022.04.05 |
| [3D 액션게임] 08. 플레이어 물리엔진 고치기 (1) | 2022.04.04 |
Contents
소중한 공감 감사합니다